We've decided to make our family blog more of a joint effort, with more of a focus more on our wacky mobile home sustainable renovations and various other projects.
Our new address is http://www.hackerhomestead.com/. Join us there!
A lot of the content here is being copied over, so if you happen to notice those crazy hackers plagiarizing our content, it's ok.
Friday, September 5, 2014
Friday, August 3, 2012
Now that it's August, I'm starting to think about planning for the upcoming school year.
Yes, I'm a total procrastinator. But not that bad. In many ways, there isn't all that much I need to do. While I *can* go sort out a week-by-week schedule with all our readings and then go through the library catalog and reserve everything in advance, I can also do that week by week.
This is the year I've been trying to figure out for years. LemurBoy is in 4th (Modern History, by the WTM cycle), while LemurGirl is in 1st (Ancients). Do I just have them do two separate tracks? Do I have LB skip Modern and start over at Ancients? Or do I wait to formally start LG until next year, when she's in second grade?
I'd pretty much decided to start LG next year. She's no huge history fan at the moment, while LB is. And Modern History has most of my favorite historical fiction, so I have a hard time passing that up.
However, LB has developed a fascination with myths, and is open to starting over with Ancients. He's also recently reached critical mass in reading, going from barely at grade level with minimal voluntary reading to reading 6th grade level novels in a few hours. This makes life so much easier, as I can assign him reading and not have to read it to him myself. What a concept!
So I'll assign him all that historical fiction I loved (we have very similar taste in books, and I have little doubt he'll love it, too), and maybe SOTW4 as independent reading, and we'll concentrate on Ancients as a family.
So, it's a good thing I procrastinated and didn't already make up weekly schedule complete with reserved books, right?
Wednesday, August 1, 2012
Sweet Baba Ganoush!
Sweet Baba Ganoush! It sounds like an exclamation, doesn't it?
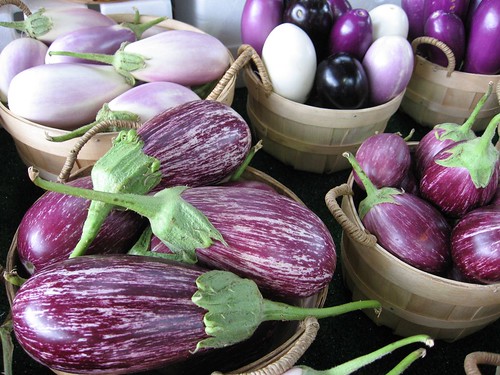
The first time I tried baba ganoush, I thought the texture would be wonderful for a dessert. Silky, fluffy, and takes on the flavor of whatever you cook it with. That was 8 years ago, and I never bothered to get an eggplant to try it with.
A few weeks ago, our Bountiful Basket contained an eggplant, and I decided it was time to give it a try. Looking around online, there is a bit of a dearth of eggplant dessert recipes. Some kind of chocolate lasagna-like concoction. A mention that sometimes baba ganoush has a touch of sugar in it. That's about it.
I'm out to change that, because my intuition was right - eggplant makes a really nice, rich, fluffy, mousse-like dessert that has the kids gobbling their veggies without complaint.
Sweet Baba Ganoush
1 eggplant
A little bit of oil
1/2 cup nut/seed/whatever butter (tahini is traditional, I used almond butter)
Flavoring ingredients
Sweetener to taste
First, roast the eggplant. Preheat the oven to 400F. Slice the eggplant in half lengthwise, rub it with oil (coconut is a good option, both for flavor and high smoke point). Put the halves cut side down on a baking tray liked with foil or parchment (if you desire). Poke all over with a fork. Stick in the oven for 15-25 minutes or so - the exact timing is going to depend on the size of the eggplant. You want it so that the flesh (not the skin) can be poked through without significant resistance. I'm told it's better to err on the side of overcooking.
Once it's roasted and cooled as much as you think is necessary, scrape the flesh out into a food processor. Process with the other ingredients until you have the taste and consistency you want. If it's too runny, add a little more of whatever butter you're using, or some other drier ingredient.
(The skins are more bitter, but also contain a lot of the nutritional value. I plan to try this with the skins included. Probably processed first, before adding the rest of the ingredients, to get them as finely processed as possible.)
What you include is up to you. I tasted the base eggplant/almond butter mixture, and it didn't have a particularly strong flavor. A bit of vanilla and sweetener would probably be fine. Quantities are flexible, and since eggplants aren't all one size, you may need to adjust the proportions to work for you.
This makes about 4 servings, depending on how big a serving you like and how big your eggplant was.
The first time I made this, I used dried figs, vanilla, and cinnamon. This made Fig Newton Ganoush, with the little crunchy seeds (no, they're not wasp eggs!) and all. The figs were actually an accident. I had an unlabeled bag of dried fruit that looked like dates. Turned out it was fig chunks.
The second time, I tried chocolate, with 1/4 cup of cocoa powder, a teaspoon of vanilla, and two teaspoons of sugar (we don't go for super sweet. In fact, LemurBoy complains if I put too much sugar in).
I think lemon would be lovely, and I think that's what I'll try next, as we're growing eggplant in our garden this year, so I'll have plenty of experiment-fodder!
Here's a creative commons picture of a eggplant for sharing purposes, because my photography sucks.
Wednesday, February 1, 2012
It is Imbolc, after all
One of Lemurboy's chores is letting the goats out to the pasture in the morning, and back into the corral in the evenings.
This evening he came running back to the house yelling "Baby goats! Baby goats!"
And indeed, there were baby goats!

We had 5 goats expecting, now we have 4! Since the billy runs with the rest of the herd, we had no idea of the actual date of conception, so we thought we likely had another few weeks. Today is appropriate, though. It's the pagan holiday of Imbolc - traditionally celebrating lambing and kidding time.
The kids are walking and nursing and so on like they're supposed to. I think that the size difference (it really is as extreme as it looks in the picture - that isn't foreshortening) is difference in genetic expression, not actual runt-iness - the dad is a pygmy, and the smaller one appears stockier than the larger one. I'm pretty sure the smaller one is a girl, and the larger a boy.
I don't think we're going to try milking this mama - she's by far the least friendly of the herd.
Another mama is showing signs that delivery is imminent. So exciting!
Tuesday, January 10, 2012
Coconut Latte
I've decided I'm too lazy to make coconut milk.
That sounds horrible, because coconut milk is really that easy to make. But I was having trouble getting consistent results, and had one batch go bad quickly after forgtting the soaking coconut on the counter overnight.
Then I discovered two things that make the laziness on this matter acceptable - blending coffee with shredded coconut produces a gorgeous latte-like foam, and it uses significantly less coconut - approximately 36 servings per cup as opposed to 12ish.
Put a cup of coffee and 1.5 teaspoons shredded coconut in a blender (I use a single serving rocket blender). Blend. Pour through a course strainer if you want - this takes out the chunks of coconut, but also reduces the foam, which you may or may not consider desirable.
The primary downside is that making coconut flour is a bit more of an effort, as you have to thoroughly rinse the strained-out coconut, assuming you don't want coffee-flavored flour.
Yum!
Wednesday, December 28, 2011
Paleo Hanukkah
Hanukkah is a Jewish holiday commemorating the retaking and rededication of the Second Temple in Jerusalem by the Maccabees. Enough oil was found to light the menorah in the temple for a single day, but miraculously it lasted for 8.
The nice thing about Hanukkah is that, with 8 days of celebration, you have plenty of time for procrastination! I intended to try this last week, but, between Christmas prep and work, it didn't happen. But that's ok, because tonight is still Hanukkah.
Fried foods are traditional for Hanukkah. The first night we made latkes - fried pancakes traditionally made out of potato, but we used zucchini (I know, big shock there). You could use pretty much any shreddable vegetable if potatoes or zucchini aren't your thing - I've seen carrot and sweet potato versions.
Today we had sufganiyot - fried jelly donuts.
Sufganiyot
Heat oil on the stove.
Make thin circles of the dough. Mine were around 3" in diameter. Place a dab of jelly in the center of half the circles, then place the other half of the circles on top, and press around the edges to seal. Toss them in the hot oil (actually, put them in gently), and fry until golden brown, flipping halfway through to get both sides cooked. Try to let them cool adequately before you munch them!
This made 8 small doughnuts for me.
Notes: I used almond butter made by food processing a bunch of almonds until relatively pasty. As such, it was rather crumbly, so I added a tablespoon of coconut oil. If you're using a more buttery nut-butter, you probably don't need to do this.
There is, of course, the question of what to fry these things in. Olive oil is traditional (that's what was used to light the menorah in the temple), but not heat-stable for frying, and I'm not sure how the flavor would work for jelly donuts. Vegetable oil is apparently common these days, but not paleo. We generally use lard for frying, but that's rather sacrilegious. Coconut oil, rendered bird fat (aka schmaltz), or ghee would probably be the most acceptable options from both a traditional and paleo standpoint.
I used jam for filling, because we had a jar on hand for reasons that are somewhat amusing, but not really my story to tell. Fresh fruit, crushed or chunked, would be more paleo.
These turned out rather dense, not light and fluffy like traditional donuts. More bread-y... like a peanut butter sandwich. But yummy! And, when I handed one to my housemate (who is Jewish-by-birth) without comment, she bit into it and said "Mmm, sufganiyot!" So I guess I got them close enough.
If you're not into celebrating Hanukkah, these would be great as an occasional treat for your paleo-kid (or paleo inner child!) who misses their PB&J - a gluten-free Uncrustable. I suspect you could bake them if frying isn't your thing, but I can't say how long they'd need to cook. I'd probably try 10 minutes at 350F, flip, and give it another 5 minutes or so.
(I also tried this with my Coconut Donut Holes recipe, but liked the PB&J version better. Just follow the recipe, but make circles and put jam in the middle as above.)
The nice thing about Hanukkah is that, with 8 days of celebration, you have plenty of time for procrastination! I intended to try this last week, but, between Christmas prep and work, it didn't happen. But that's ok, because tonight is still Hanukkah.
Fried foods are traditional for Hanukkah. The first night we made latkes - fried pancakes traditionally made out of potato, but we used zucchini (I know, big shock there). You could use pretty much any shreddable vegetable if potatoes or zucchini aren't your thing - I've seen carrot and sweet potato versions.
Today we had sufganiyot - fried jelly donuts.
Sufganiyot
- 1 to 1 1/2 cups coconut flour
- 1 1/2 cups nut butter + oil if needed (See note)
- 2-3 eggs (I used two jumbo eggs)
- 1/2 teaspoon baking soda (probably omittable. I don't think mine puffed up much at all)
- 1/2 teaspoon salt (reduce or omit if using salted nut butter, increase if you prefer)
- A little sweetener if desired (I left it out)
- Filling - jam, jelly, fruit, chocolate - whatever floats your boat. If you really want it PB&J like, put a dab of nut butter along with the jam, rather than just having it in the dough.
- Oil for frying (see below)
Heat oil on the stove.
Make thin circles of the dough. Mine were around 3" in diameter. Place a dab of jelly in the center of half the circles, then place the other half of the circles on top, and press around the edges to seal. Toss them in the hot oil (actually, put them in gently), and fry until golden brown, flipping halfway through to get both sides cooked. Try to let them cool adequately before you munch them!
This made 8 small doughnuts for me.
Notes: I used almond butter made by food processing a bunch of almonds until relatively pasty. As such, it was rather crumbly, so I added a tablespoon of coconut oil. If you're using a more buttery nut-butter, you probably don't need to do this.
There is, of course, the question of what to fry these things in. Olive oil is traditional (that's what was used to light the menorah in the temple), but not heat-stable for frying, and I'm not sure how the flavor would work for jelly donuts. Vegetable oil is apparently common these days, but not paleo. We generally use lard for frying, but that's rather sacrilegious. Coconut oil, rendered bird fat (aka schmaltz), or ghee would probably be the most acceptable options from both a traditional and paleo standpoint.
I used jam for filling, because we had a jar on hand for reasons that are somewhat amusing, but not really my story to tell. Fresh fruit, crushed or chunked, would be more paleo.
These turned out rather dense, not light and fluffy like traditional donuts. More bread-y... like a peanut butter sandwich. But yummy! And, when I handed one to my housemate (who is Jewish-by-birth) without comment, she bit into it and said "Mmm, sufganiyot!" So I guess I got them close enough.
If you're not into celebrating Hanukkah, these would be great as an occasional treat for your paleo-kid (or paleo inner child!) who misses their PB&J - a gluten-free Uncrustable. I suspect you could bake them if frying isn't your thing, but I can't say how long they'd need to cook. I'd probably try 10 minutes at 350F, flip, and give it another 5 minutes or so.
(I also tried this with my Coconut Donut Holes recipe, but liked the PB&J version better. Just follow the recipe, but make circles and put jam in the middle as above.)
Thursday, December 15, 2011
Awesomesauce Gingerbread Cake. Also Goat Liver Cake
Oh gosh, I know this isn't the Awesomesauce Cake Blog, but this one turned out ridiculously delicious, and it's nice and seasonal.
Awesomesauce Gingerbread
Note about cocoa powder vs. molasses: I used cocoa powder in making this cake. I have nothing in particular against molasses. As far as sweeteners go, I think it's a comparatively healthy option, what with all the iron and trace minerals, and with a lower glycemic index than many sweeteners. And I certainly wouldn't say that cocoa powder is any less "neolithic" or processed. However, I didn't have any on hand, and cocoa powder provides a similar color and deep, bitter flavor.
Yesterday, I cooked up a goat liver pâté. It didn't turn out very pâté-like. More like meatloaf.
A little disappointing, but it turned out for the best.
LemurBoy isn't crazy about liver, but loves meatloaf. Especially "cheeseburger style" - on lettuce leaves, topped with cheese, mayo, and mustard.
LemurGirl likes liver in pretty much any context in which I've offered it, but hates meatloaf.
So, I called this pâté for LemurGirl, and meatloaf for LemurBoy, and they both enjoyed it.
LemurGirl's quote of the day: "A liver pâté is kind of like a cake except it doesn't taste like one!"
Awesomesauce Gingerbread
- Approximately 1/2 cup fat of choice (Anything at least semi-solid at room temp. I used lard this time. Butter oil/ghee is my favorite for baked goods. Coconut oil or plain old butter will work fine. You could even try avocado, which apparently works well in baking as a butter substitute.)
- 2 Tbsp sugar (or the equivalent in your preferred sweetener)
- 4 eggs (at room temperature)
- 1/2 teaspoon vanilla extract (I didn't have any, so left it out)
- 1 1/2 cups coconut flour
- 1 teaspoon baking soda
- 1/4 teaspoon baking powder
- 1/4 teaspoon salt
- 3/4 cup applesauce
- 1 Teaspoon cinnamon (or to taste)
- 2 Teaspoons ginger (or to taste)
- 2 tablespoons cocoa powder or blackstrap molasses (you may wish to reduce added sweetener and add 1 tbsp coconut flour if using molasses)
- Ground cloves, ground allspice, grated nutmeg, lemon zest, black pepper to taste (Approx. 1/4 - 1/2 tsp each. Pick and choose which you want depending on what is traditional for you and what you have on hand)
- Optional - shredded carrot, zucchini, or apple, raisins or other dried fruit, nuts, candied ginger, chocolate chips. We added about 1/4 cup of chocolate chips left over from something else, and it was amazing.
Note about cocoa powder vs. molasses: I used cocoa powder in making this cake. I have nothing in particular against molasses. As far as sweeteners go, I think it's a comparatively healthy option, what with all the iron and trace minerals, and with a lower glycemic index than many sweeteners. And I certainly wouldn't say that cocoa powder is any less "neolithic" or processed. However, I didn't have any on hand, and cocoa powder provides a similar color and deep, bitter flavor.
Yesterday, I cooked up a goat liver pâté. It didn't turn out very pâté-like. More like meatloaf.
A little disappointing, but it turned out for the best.
LemurBoy isn't crazy about liver, but loves meatloaf. Especially "cheeseburger style" - on lettuce leaves, topped with cheese, mayo, and mustard.
LemurGirl likes liver in pretty much any context in which I've offered it, but hates meatloaf.
So, I called this pâté for LemurGirl, and meatloaf for LemurBoy, and they both enjoyed it.
LemurGirl's quote of the day: "A liver pâté is kind of like a cake except it doesn't taste like one!"
Wednesday, November 23, 2011
LemurBoy's Paleo Coconut Custard
LemurBoy contribution to Thanksgiving dinner. He just made this all by himself, with just a little help with the oven!
LemurBoy's Paleo Coconut Custard
Ingredients:
Serves: 6-8
Preheat oven to 350 degrees F. Blend all ingredients except coconut flakes in food processor until smooth. Pour mixture into ramekins (we used pint sized glass jars), and put a pinch of coconut flakes in each. Place ramekins into a larger pan, and fill pan part way with water. Cover pan, and bake for 30 minutes.
Note: Applesauce made this sweet enough for us, but you might want to use a little added sweetener if cooking for standard taste buds or if you're not using yummy homemade applesauce. Zucchini flour is zucchini that has been shredded, dehydrated, and ground-up. If you're part of the 99.99999999% of households who don't happen to have zucchini flour on hand, I'd imagine coconut flour would work similarly. You could probably even omit it entirely and still get a good custard, but why not take the opportunity to work in an unnoticed serving of veggies?
LemurBoy's Paleo Coconut Custard
Ingredients:
- 3 eggs
- 1/2 cup applesauce
- 1/4 cup zucchini flour (or coconut flour)
- Scant 1/4 tsp salt
- 1 tsp cinnamon
- 1 1/2 cups coconut milk
- Coconut flakes
Serves: 6-8
Preheat oven to 350 degrees F. Blend all ingredients except coconut flakes in food processor until smooth. Pour mixture into ramekins (we used pint sized glass jars), and put a pinch of coconut flakes in each. Place ramekins into a larger pan, and fill pan part way with water. Cover pan, and bake for 30 minutes.
Note: Applesauce made this sweet enough for us, but you might want to use a little added sweetener if cooking for standard taste buds or if you're not using yummy homemade applesauce. Zucchini flour is zucchini that has been shredded, dehydrated, and ground-up. If you're part of the 99.99999999% of households who don't happen to have zucchini flour on hand, I'd imagine coconut flour would work similarly. You could probably even omit it entirely and still get a good custard, but why not take the opportunity to work in an unnoticed serving of veggies?
Tuesday, November 8, 2011
Spontaneity
One afternoon, shortly before we moved, a group of us parents sat around avoiding the summer heat under a big weeping willow at Park Day. A new member had joined us that day, and one of the dads present was explaining the makeup of the group. Pointing to each of us in turn, "Unschooler, unschooler, unschooler, unschooler, classical."
As the penultimate member of the list, I responded with something along the lines of, "Actually, we're more on the classical side." This raised some expressions of surprise, as I suppose we come across as being rather relaxed.
Are we classical? We follow a 4 year history cycle, and occasionally do narrations and stuff. We do a little Latin and I intend to order some more of that sometime soon in hopes of interesting LemurBoy a little more. But we're certainly much less rigorous than my good friend who was the last member of that list.
I definitely wouldn't say we're unschoolers, except maybe we kind of are right now. We do a lot of "life learning" at this point because we have a lot around us to learn (I suspect my children are more familiar with the structure of the standard organs of vertebrates than your typical college Anatomy student), and are a bit light on the formal academics in favor of interest-driven activities.
But we still follow the 4-year history cycle! Though we might well not if LemurBoy wasn't a history buff, but I credit Story Of The World with making him one.
Anyways, I've called our style ADHD-Classical. Tidal homeschooling is a rather more eloquent way of stating it. "Eclectic" works, too. Somewhere in the wide spectrum of possibilities between extremely rigorous and completely lax.
When I mentioned homeschooling in a recent Diaspora post (want an invite? Let me know. I'd really like it to actually go somewhere), a friend asked about how we structured our lesson plans.
NCERT, the National Council of Educational Research and Training in India, offers their textbooks as free downloads. I find them to be engaging, and an interesting look at a different culture, so we use them to shake things up a little, especially for math.
This week we read the story of the old man who tries to pull up a giant carrot. He can't, so he gets his wife to help. They can't together, so they get their granddaughter, dog, cat, and finally a mouse, who provides the extra bit of pull to remove the stubborn carrot. And this version ends "And then they made Gajar Ka Halwah".
Gajar Ka Halwah - what's that? So we looked it up. It is, essentially, carrot pudding, though a rather more complex and elegant version than the one I invented.
We looked up recipes, and noted the we had everything important for it (or a reasonable substitution) on hand. So we made it, and it was good.
This totally could have happened with a less seat-of-our-pants approach. And it could have gone wrong if, say, we didn't have a kitchen already stocked for cooking Indianesque food and a penchant for buying the 25lb bags of carrots. I imagine that if I'd had to take a trip to the store for cardamom, it would have ended up being forgotten.
However, the journey was worth something educationally. We learned about looking things up, and about adapting recipes to fit our dietary preferences and pantry. A trip to the store for cardamom might have proven even more educational. as I suspect that, around here, that would have meant a trip to an ethnic store, where perhaps we would have found something even more new and interesting. None of that would have happened (or only in a contrived form) if I'd been a good lesson-planner and actually read ahead in the book and figured out in advance that this would be an Excellent Learning Experience.
And if we'd stuck doggedly to our scheduled math curriculum rather than tossing it out the figurative window because it was provoking frustration (temporarily, anyways. We spent good money on it and I imagine I'll give it another stab sooner or later), we wouldn't have been using the books that led us to find this recipe.
Gajar Ka Halwah (gluten/soy/egg-free, can be dairy-free)
As the penultimate member of the list, I responded with something along the lines of, "Actually, we're more on the classical side." This raised some expressions of surprise, as I suppose we come across as being rather relaxed.
Are we classical? We follow a 4 year history cycle, and occasionally do narrations and stuff. We do a little Latin and I intend to order some more of that sometime soon in hopes of interesting LemurBoy a little more. But we're certainly much less rigorous than my good friend who was the last member of that list.
I definitely wouldn't say we're unschoolers, except maybe we kind of are right now. We do a lot of "life learning" at this point because we have a lot around us to learn (I suspect my children are more familiar with the structure of the standard organs of vertebrates than your typical college Anatomy student), and are a bit light on the formal academics in favor of interest-driven activities.
But we still follow the 4-year history cycle! Though we might well not if LemurBoy wasn't a history buff, but I credit Story Of The World with making him one.
Anyways, I've called our style ADHD-Classical. Tidal homeschooling is a rather more eloquent way of stating it. "Eclectic" works, too. Somewhere in the wide spectrum of possibilities between extremely rigorous and completely lax.
When I mentioned homeschooling in a recent Diaspora post (want an invite? Let me know. I'd really like it to actually go somewhere), a friend asked about how we structured our lesson plans.
Uh, lesson plans? We're supposed to do that? That's one of those responses that probably makes homeschoolers sound bad, isn't it?
I guess I do lesson plan to some extent. I have a basic outline of what chapters I want to read when for a few subjects, and various supplemental readings, videos, and so forth associated with the subject. And I have the supplemental readings for the next year scheduled into our wonderful library system, set to go on hold a few weeks before we need them. That's awfully organized, isn't it? It thrills me to no end that I can do that, which is why I mention it constantly.
But most of the time, we're pretty much seat-of-the-pants types.
But most of the time, we're pretty much seat-of-the-pants types.
I'm not trying to claim this is ideal. I'm sure we'd get much more academic done if I made a weekly schedule like this for all subjects. And I'm sure that the schedule is the only reason we keep reasonably on track with history.
At the same time, there are sometimes benefits to seat-of-the-pants.
At the same time, there are sometimes benefits to seat-of-the-pants.
NCERT, the National Council of Educational Research and Training in India, offers their textbooks as free downloads. I find them to be engaging, and an interesting look at a different culture, so we use them to shake things up a little, especially for math.
This week we read the story of the old man who tries to pull up a giant carrot. He can't, so he gets his wife to help. They can't together, so they get their granddaughter, dog, cat, and finally a mouse, who provides the extra bit of pull to remove the stubborn carrot. And this version ends "And then they made Gajar Ka Halwah".
Gajar Ka Halwah - what's that? So we looked it up. It is, essentially, carrot pudding, though a rather more complex and elegant version than the one I invented.
We looked up recipes, and noted the we had everything important for it (or a reasonable substitution) on hand. So we made it, and it was good.
This totally could have happened with a less seat-of-our-pants approach. And it could have gone wrong if, say, we didn't have a kitchen already stocked for cooking Indianesque food and a penchant for buying the 25lb bags of carrots. I imagine that if I'd had to take a trip to the store for cardamom, it would have ended up being forgotten.
However, the journey was worth something educationally. We learned about looking things up, and about adapting recipes to fit our dietary preferences and pantry. A trip to the store for cardamom might have proven even more educational. as I suspect that, around here, that would have meant a trip to an ethnic store, where perhaps we would have found something even more new and interesting. None of that would have happened (or only in a contrived form) if I'd been a good lesson-planner and actually read ahead in the book and figured out in advance that this would be an Excellent Learning Experience.
And if we'd stuck doggedly to our scheduled math curriculum rather than tossing it out the figurative window because it was provoking frustration (temporarily, anyways. We spent good money on it and I imagine I'll give it another stab sooner or later), we wouldn't have been using the books that led us to find this recipe.
Gajar Ka Halwah (gluten/soy/egg-free, can be dairy-free)
(based on the recipe at http://www.sailusfood.com/2011/04/27/gajar-carrot-ka-halwa/)
- 2 cups grated carrot
- 2-3 tbsps ghee/clarified butter (See notes)
- 3/4 cup milk (we used coconut milk without problem)
- 2 cloves
- 3 tbsps applesauce (in place of condensed milk, use condensed milk if you have it and do dairy. Smashed banana might also work well, too.)
- Sweetener to taste (original recipe called for 2-3 tbsp sugar, 1 was plenty sweet for us, and we probably could have gotten by with half that and still had it be dessert.)
- 1/2 tsp ground cardamom
- few raisins, almonds, cashew nuts, and/or pistachios lightly roasted in ghee (optional, but probably good. We didn't have them, so we left them out.)
- few strands of saffron mixed in a tbsp of milk (I'm not going to say "optional", since it's probably fairly essential for truly authentic taste, but don't let lack of this scare you off the recipe!)
Remove the cloves (or leave them in and warn the kids not to bite them if you can't find them easily), add the cardamom and saffron and mix. Garnish with toasted nuts and raisins.
Serve warm or cold. I think it's best warm, but you don't have to reheat any leftovers before serving!
Notes on ghee: Ghee is a form of clarified butter. Clarifying butter removes the milk solids, which raises the smoke point, making it healthier for frying things. It also makes it edible for most people with dairy intolerances, as the casein and lactose are removed (I'd still avoid it if you have a life-threatening allergy). I've been making small quantities on the stovetop, or you can make it in a slow cooker.
If you don't desire to use clarified butter for whatever reason, plain butter is fine. Coconut oil or any other oil with a high smoke point and pleasant flavor should work too, but butter, clarified or otherwise, adds flavor.
If you don't desire to use clarified butter for whatever reason, plain butter is fine. Coconut oil or any other oil with a high smoke point and pleasant flavor should work too, but butter, clarified or otherwise, adds flavor.
Monday, October 24, 2011
Awesomesauce Cake II
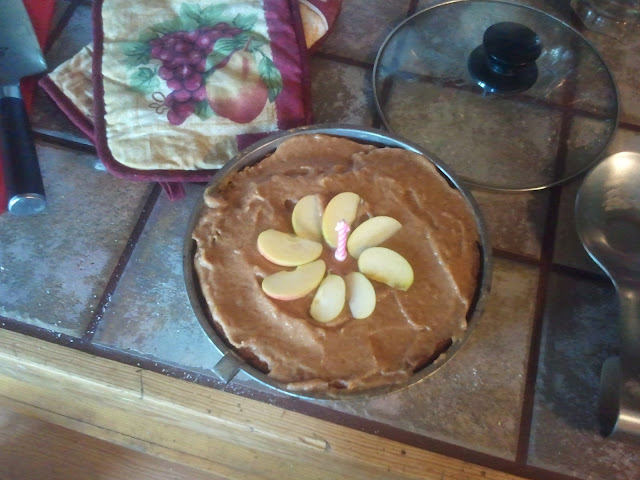
Happy Birthday, LemurBaby!

This cake is a variation on the chocolate cake I made for LemurGirl's birthday last month:
Awesomesauce Apple Cake
This cake came out a little on the wet side. Not to the point of being unpresentable, but it got rather brown around the edges before being anywhere close to done in the center. Either a little more coconut flour, a little less applesauce or oil (I'm hesitant to reduce the applesauce, since it's providing flavor), or eliminating the coconut milk would probably help.
Note on sweetener: I used homemade applesauce made from fresh-picked apples, so it was very sweet and flavorful (This is easy - stick apples, peeled or not, in a crock pot with about a half cup of water and whatever spices you want until soft, blend if you left the skins on and want a smooth sauce). I think I could have left out the sugar entirely, or maybe added just a tablespoon. However, plain old storebought unsweetened applesauce would probably need the 1/4 cup, or maybe even a little more. If using a liquid sweetener, you may need to adjust the amount of other liquid accordingly (ie. reduce the applesauce a little).
This cake is a variation on the chocolate cake I made for LemurGirl's birthday last month:
Awesomesauce Apple Cake
- Approximately 1/2 cup butter oil (Coconut oil or plain butter both have similar properties and should work instead, but I think butter or butter oil really works best flavor-wise if you can tolerate it. Coconut butter might work well - whizzing two cups of coconut in a blender or food processor until pasty (2-10 minutes, depending on how powerful yours is). You might also be able to use nut butter of whatever type you prefer.)
- 1/4 cup sugar (or the equivalent in other sweetener) (see note)
- 4 eggs (at room temperature)
- 1/2 teaspoon vanilla extract (I didn't have any, so left it out)
- 1 1/2 cups coconut flour
- 1 teaspoon baking soda
- 1/4 teaspoon baking powder
- 1/4 teaspoon salt
- 1/4 cup milk (of whatever type you prefer - I used homemade coconut milk)
- 3/4 cup applesauce + more for frosting
- 1 Teaspoon cinnamon (plus any other spices you want - my applesauce already had cinnamon, ginger, and nutmeg. If yours doesn't, you probably want to add some)
- Optional - shredded carrot, zucchini, or apple, raisins or other dried fruit, nuts, candied ginger
This cake came out a little on the wet side. Not to the point of being unpresentable, but it got rather brown around the edges before being anywhere close to done in the center. Either a little more coconut flour, a little less applesauce or oil (I'm hesitant to reduce the applesauce, since it's providing flavor), or eliminating the coconut milk would probably help.
Note on sweetener: I used homemade applesauce made from fresh-picked apples, so it was very sweet and flavorful (This is easy - stick apples, peeled or not, in a crock pot with about a half cup of water and whatever spices you want until soft, blend if you left the skins on and want a smooth sauce). I think I could have left out the sugar entirely, or maybe added just a tablespoon. However, plain old storebought unsweetened applesauce would probably need the 1/4 cup, or maybe even a little more. If using a liquid sweetener, you may need to adjust the amount of other liquid accordingly (ie. reduce the applesauce a little).
Monday, October 17, 2011
Gluten Free Cornbread
Not grain-free, but this one is a pet peeve of mine.
Cornbread, to me, is a bread made with cornmeal. This is how I was raised. I had no idea the ubiquity of the "cake with an accent of cornmeal" type of cornbread until shortly after we moved. My cookbook was still packed up, and I wasn't quite sure of the recipe, so I googled for a cornbread recipe, hoping to find something that would work.
Everything that popped up contained flour.
So I got smart, or so I thought, and searched for gluten-free cornbread. Everything that popped up contained a zillion ingredients, including at least 3 different types of non-wheat flour, plus a gum of some sort.
It doesn't have to be that difficult, people. This is one reason people get scared off by gluten-free - so many of the recipes require a trip to a specialty store. But really, you can make perfectly good, tasty stuff with only ingredients that you can find at any decent supermarket.
Finally, I googled for "Joy Of Cooking cornbread" and found my naturally gluten-free recipe:
1 tablespoon fat of choice (for greasing pan)
1 ¾ cups cornmeal
1 tablespoon sugar (or more, or less, or none, or alternative sweetener, depending on your preferences)
1 teaspoon baking powder
1 teaspoon baking soda
1 teaspoon salt
2 large eggs
2 cups buttermilk (can replace with any slightly acidic liquid - I generally use 1 cup coconut milk and 1 cup water with a tablespoon of vinegar or lemon juice added. You could also use thinned yogurt or sour cream, or any other dairy or non-dairy milk with vinegar or lemon juice added)
Preheat the oven to 450 degrees. Grease a heavy 9-inch oven-proof skillet, preferably cast iron, or an 8-inch square glass baking dish. If you want to be traditional, you grease the cast-iron skillet and stick it in the oven to preheat. I don't usually do that.
Mix together dry ingredients. Crack and beat eggs. Add buttermilk (or appropriate replacement) to eggs an mix. Add to the dry ingredients and whisk just until blended. Place the skillet or pan in the oven and heat until the fat smokes (or don't, if that sort of excitement doesn't appeal. It will work fine starting with a cold pan). Pour in the batter all at once and stick in the oven.
Bake until the top is browned and the center feels firm when pressed, 20 to 25 minutes Serve immediately from the pan, cut into wedges or squares with butter (or whatever topping you prefer).
There you go. Gluten-free cornbread with no special ingredients.
I have made it with masa harina in place of about 1/2 cup of cornmeal, and that makes it really nice and fluffy (though gives it a slight tortilla taste). You might get similar results with some other non-wheat flour. I couldn't tell you, since I haven't tried. But straight cornmeal really works just fine.
Monday, October 10, 2011


Wednesday, September 28, 2011
Birthday Menu
LemurGirl turns 5 today! Here's what we ate to celebrate:
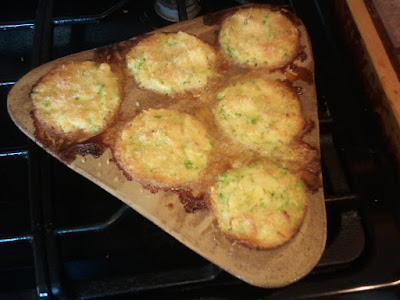
Pizza Muffins
1/4 cup pepperoni
1/4 cup dried tomatoes
1/4 cup fat of choice
2 tablespoons tomato sauce (I used salsa)
3 eggs
1/2 cup coconut flour
1/2 tablespoon (or more) oregano
1 teaspoon garlic powder
1 teaspoon onion powder
1/4 teaspoon salt
1/2 teaspoon baking powder
Preheat oven to 350F.
Combine pepperoni, dried tomatoes, spices, fat, tomatoes, and tomato sauce/salsa in food processor. Pulse a few times to mix. Let sit a few minutes to let the tomatoes soak a bit (not necessary if you use tomatoes stored in oil, but ours were pretty dry and hard). Let sit a few minutes, and add a little more coconut flour if it doesn't seem the proper texture (add a tablespoon or less at a time). Add the rest of the ingredients and pulse a few more times. Spoon out into muffin tins (greased or lined). Bake for about 25 minutes, until they don't jiggle and a fork stuck in them comes out clean.
This made 10 muffins for me. I probably could have gotten 12 by making them a little smaller. I think you could cut back on the fat, especially if using tomatoes stored in oil - they were rather greasy. I was kinda hoping enough grease would make them come off the liners easier. No such luck.
There's nothing sacred about the pepperoni. It's a good traditional pizza topping, but mainly just happened to be what I had on hand. Use whatever your favorite toppings are (if you don't want it to be food processed, chop up by hand and stir them in at the end, but I didn't feel like hand-slicing my pepperoni up into little bits). You could probably also throw in some spinach or zucchini or something without hurting anything. Mix some shredded cheese in or sprinkle it on top if you do dairy.
Awesomesauce Chocolate Cake
This came to be because LG requested a chocolate cake with apple frosting. The apple frosting threw me a bit at first. Then I realized "apple frosting" = pureed apple, and is really about as simple as frosting can get.
Preheat oven to 350F. Mix dry ingredients in a mixing bowl. Mix wet ingredients separately, then gradually add dry ingredients to wet ingredients. Bake for about 30 minutes, until it doesn't jiggle and a fork stuck in the center comes out clean. Makes 1 8" diameter circular cake.
This turned out delicious. I'm going to modify it (carrot/apple/spice instead of cocoa, probably) for LemurBaby's birthday next month.
Caveats: As usual, I'm recreating these from memory after the fact, so please tell me something seems wrong. I'm cooking in a desert climate at high altitude, though coconut flour doesn't seem to have as many altitude issues as others. My homemade coconut flour doesn't seem to function quite the same as store-bought (though I'm using roughly the measures used in similar recipes and it turned out well this time), so you may need to use a bit less.
For ice cream, we used Jello created with 1/2 cup water, 1 1/2 cups coconut milk mixed in the ice cream maker. Bad, I know, but easy, and more reliable taste-wise than my from-scratch concoctions.
For dinner we had (at her request), baked chicken and carrots.

Pizza Muffins
1/4 cup pepperoni
1/4 cup dried tomatoes
1/4 cup fat of choice
2 tablespoons tomato sauce (I used salsa)
3 eggs
1/2 cup coconut flour
1/2 tablespoon (or more) oregano
1 teaspoon garlic powder
1 teaspoon onion powder
1/4 teaspoon salt
1/2 teaspoon baking powder
Preheat oven to 350F.
Combine pepperoni, dried tomatoes, spices, fat, tomatoes, and tomato sauce/salsa in food processor. Pulse a few times to mix. Let sit a few minutes to let the tomatoes soak a bit (not necessary if you use tomatoes stored in oil, but ours were pretty dry and hard). Let sit a few minutes, and add a little more coconut flour if it doesn't seem the proper texture (add a tablespoon or less at a time). Add the rest of the ingredients and pulse a few more times. Spoon out into muffin tins (greased or lined). Bake for about 25 minutes, until they don't jiggle and a fork stuck in them comes out clean.
This made 10 muffins for me. I probably could have gotten 12 by making them a little smaller. I think you could cut back on the fat, especially if using tomatoes stored in oil - they were rather greasy. I was kinda hoping enough grease would make them come off the liners easier. No such luck.
There's nothing sacred about the pepperoni. It's a good traditional pizza topping, but mainly just happened to be what I had on hand. Use whatever your favorite toppings are (if you don't want it to be food processed, chop up by hand and stir them in at the end, but I didn't feel like hand-slicing my pepperoni up into little bits). You could probably also throw in some spinach or zucchini or something without hurting anything. Mix some shredded cheese in or sprinkle it on top if you do dairy.
Awesomesauce Chocolate Cake
This came to be because LG requested a chocolate cake with apple frosting. The apple frosting threw me a bit at first. Then I realized "apple frosting" = pureed apple, and is really about as simple as frosting can get.
- Approximately 1/2 cup butter oil (I clarified 1/2 cup of butter and used the results, so it was something less than 1/2 cup. Coconut oil or plain butter both have similar properties and should work instead)
- 1/2 cup sugar (or the equivalent in other sweetener)
- 4 eggs (at room temperature)
- 1/2 teaspoon vanilla extract (I didn't have any, so left it out)
- 1 cups coconut flour
- 1/2 cup unsweetened cocoa powder
- 1 teaspoon baking soda
- 1/4 teaspoon baking powder
- 1/2 teaspoon salt
- 1/2 cup milk (of whatever type you prefer - I used homemade coconut milk)
- 1/2 cup cinammon applesauce (I used pureed fresh apple, not jarred applesauce) + more for frosting
Preheat oven to 350F. Mix dry ingredients in a mixing bowl. Mix wet ingredients separately, then gradually add dry ingredients to wet ingredients. Bake for about 30 minutes, until it doesn't jiggle and a fork stuck in the center comes out clean. Makes 1 8" diameter circular cake.
This turned out delicious. I'm going to modify it (carrot/apple/spice instead of cocoa, probably) for LemurBaby's birthday next month.
Caveats: As usual, I'm recreating these from memory after the fact, so please tell me something seems wrong. I'm cooking in a desert climate at high altitude, though coconut flour doesn't seem to have as many altitude issues as others. My homemade coconut flour doesn't seem to function quite the same as store-bought (though I'm using roughly the measures used in similar recipes and it turned out well this time), so you may need to use a bit less.
For ice cream, we used Jello created with 1/2 cup water, 1 1/2 cups coconut milk mixed in the ice cream maker. Bad, I know, but easy, and more reliable taste-wise than my from-scratch concoctions.
For dinner we had (at her request), baked chicken and carrots.
Wednesday, September 14, 2011
Meet our new family member
This is Kenya, the newest member of our herd.
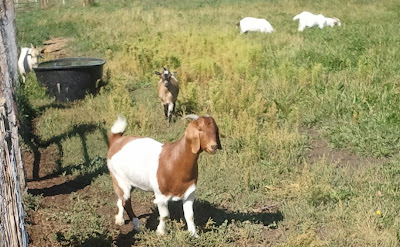
She's a year old Boer goat.

Kenya and Marsha
She's a little bigger than our others, even the non-pygmies. And that's how we got her. LemurDa knows an older woman who keeps goats, and Kenya was too big for her to handle. She wanted her to go to a good home who wouldn't eat her, and we can do that much. No promises on any offspring, though.

At the moment, she's a little skittish, and hard to herd back into the corral in the evening, but obviously attuned to humans, and I don't expect we'll have trouble once she figures out that we provide food.
And so, we've been singing a lot of this these past several days:
She's a year old Boer goat.
Kenya and Marsha
She's a little bigger than our others, even the non-pygmies. And that's how we got her. LemurDa knows an older woman who keeps goats, and Kenya was too big for her to handle. She wanted her to go to a good home who wouldn't eat her, and we can do that much. No promises on any offspring, though.
At the moment, she's a little skittish, and hard to herd back into the corral in the evening, but obviously attuned to humans, and I don't expect we'll have trouble once she figures out that we provide food.
And so, we've been singing a lot of this these past several days:
Friday, September 9, 2011
Lunchbox Challenged
Paleo Parents is having a Paleo Lunchbox Challenge.
Unfortunately, as homeschoolers, we are inherently Lunchbox Challenged, and not in a way that is conducive to this particular contest. We don't even own lunchboxes.
This is a normal lunch for us:
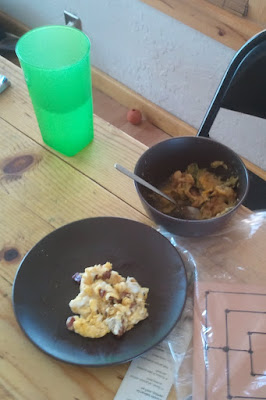
Scrambled egg with bacon, leftover Shrimp, Sausage, and Summer Squash casserole, and water.

Gratuitous baby picture
Not exactly practical eating after sitting around in a lunchbox for half a day, right?
So, we decided to make a more travel-appropriate lunch.
When I told the kids we were going to make lunchboxes, LemurBoy took it literally, and went out to saw a piece of wood to make a box. This particular plan was perhaps a bit overambitious, but, after some drama at the idea of not creating a permanent lunchbox, they happily settled down with cardboard boxes.
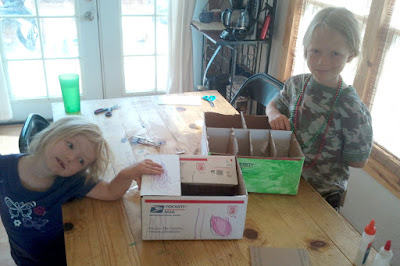
I'm pretty sure LB re-invented the Bento all on his own
With the kids' input, we decided to try to make sandwiches, baked pumpkin, roasted pumpkin seeds, and carrot sticks.
We've been reading The Little House Cookbook. Given the prominence of grains in the diet of the time, this may seem an odd choice for us, but it's full of traditional food recipes, including lots of garden produce, wild game, food preservation, and all that other good stuff. Some of the grainy recipes can be adapted to grain-free alternatives, but there's plenty that require little or no adaptation. It's all set in a kid-appealing context (the Little House series) with plenty of good historical food and lifestyle info.
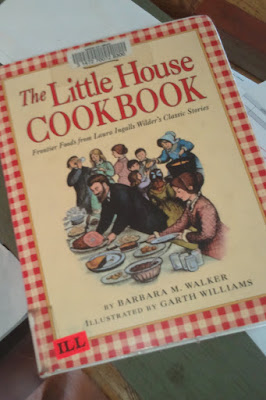
The cookbook
Since we have little pumpkins coming ripe in the garden, we decided to use those for a Little House-style recipe. We actually used (roughly, anyways) the Hubbard Squash recipe, as it was more appropriate to what we wanted to do than the actual pumpkin recipes, and read about how both pumpkins and other squashes were grown and used.

Little pumpkins (Jack-Be-Little variety, I believe) on the vine
The green beans were also from our garden.
Preheat oven to 350F. Cut tops off pumpkins (or other winter squash) as you would for jack-o-lantern, or just slice them in half. Unless you specifically want to preserve the cute pumpkin shape, cutting them down the middle is going to be much easier. De-seed. I saved the seeds for roasting. Rub inside of pumpkin with an heat-appropriate fat (recipe suggests butter. I used bacon grease), and spice as desired. For these, I used a mixture of cinnamon, ginger, nutmeg, and a touch of salt, so they'd be like pumpkin pies. You could probably drizzle a little maple syrup or other sweetener to make them more dessert like. A more savory spice mix works well, too. Put the pumpkins skin-side down in a baking tray, and fill the tray about 1/2 inch full of water. Bake until soft enough to poke with a fork - 1.5-2 hours.
For roasted pumpkin seeds, clean pulpy bits from seeds (this is time consuming and irritating). Lightly coat with oil, spice and salt as desired (I used a random mix including garlic powder, paprika, onion powder, and other stuff that I'm not sure of), and spread in a single layer on a baking tray. Bake at 350 until golden brown, or about 20-30 minutes.
Next time I make them, I'll plan ahead more and soak them in salt water for 24 hours first. This reduces the phytic acid, an anti-nutrient. Also, it makes them salty.
I've been experimenting with coconut flour lately. Coconut flour is made from defatted coconut (if the fat is there, it turns into coconut butter intead of flour), and is rather expensive. Making coconut milk from shredded coconut results in lots of coconut pulp... or defatted coconut. So now I'm drying the pulp and blendering it up into flour, and I've been trying various recipes to see if it seems to perform the same as store-bought coconut flour (which I've never bought). I've made cookies and pancakes with good success, so we decided to try some sandwich bread.
This (or minor variations thereof) is the most common pure coconut flour recipe. I cut it in half, replaced most of the oil with pear puree (both primarily for cost reasons), and didn't include added sweetener.

Waiting for the bread to bake.
It came out very flat. I'm not certain our baking powder, which well over a year old and not particularly well-stored, is still active. So I ended up chopping the loaf into three sections, then in half length-wise, sub style, rather than doing more traditional sandwich slices.
While everything cooked (I did everything in the oven at once, just for varying lengths of time), LB cut up carrot sticks, and made himself some deviled eggs, too.
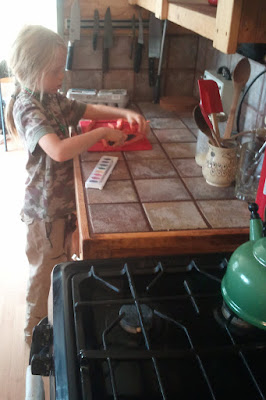
LB cutting carrot sticks
I fried up some thinly sliced steak that had been marinating in the fridge, and used that in LB and my sandwiches. LG declared she didn't want meat - she wanted a carrot sandwich. So that's what she had.
I also hard boiled some eggs, since we were out.
The results:
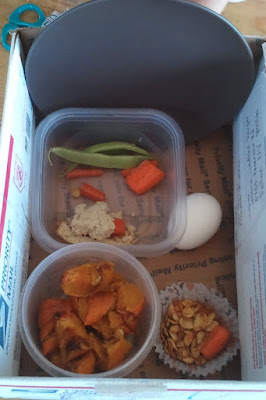
LG's finished lunch - Carrot sandwich on coconut bread (mostly eaten), green beans, hard boiled egg, baked pumpkin, roasted pumpkin seeds.
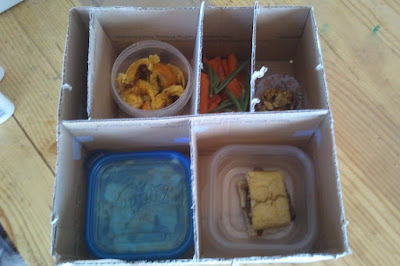
LB's lunch - Coconut bread sandwich with steak strips, deviled eggs, baked pumpkin, carrot sticks and green beans, roasted pumpkin seeds.
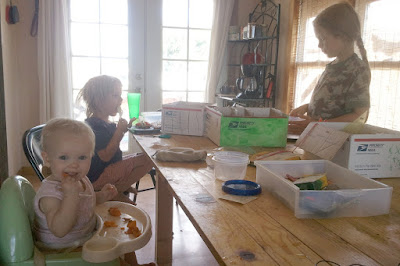
Nomming

Once again, a gratuitous baby eating vegetables shot
The bread ended up tasting very eggy (which was also my experience when making muffins). I have a feeling I have to use a larger quantity of the homemade flour than I would of store-bought. The cookies I made the other day turned out very cookie-like, and not particularly eggy, but in that case I kept adding flour until the dough held together.
The kids liked it, regardless.
The pumpkin was not a huge hit with the older kids. Honestly, one of them turned out amazing - sweet and full of pumpkiny flavor, but the other three were kind of bland. Not horrible, and they probably would have been very good with some butter and maple syrup, but not nearly so tasty as the other one.
Unfortunately, many squashes don't seem to play well with me and the baby's digestive systems. Most unfortunate, since we're the ones who like them!
Everyone loved the pumpkin seeds. We had some seeds from other squash mixed in there too, and those turned out just as good. We'll be saving up our squash seeds from now on to make bigger batches.
Practicality:
This is not a lunch you can throw together the morning of. It took hours to get everything together - some time could be cut from that with more experience (not fumbling with the bread recipe, cutting the pumpkins in a simpler way), but much was unavoidable baking time. However, most of it could be made in quantity in advance and most of the individual recipes weren't all that time consuming (requiring more baking time than actual prep time). The pumpkin, while good warm, would be best for a lunchbox if cooked ahead of time and chilled. These would be very simple to prep and throw in the oven while something else was cooking. The pumpkin seeds keep for a while if stored properly, so it would be easy to make a big batch once and dole them out appropriately. I don't know how well the bread keeps, and therefore I don't know whether it would be practical to make a big batch at once.
As a bonus, here's an actual "lunch" that got taken to work:
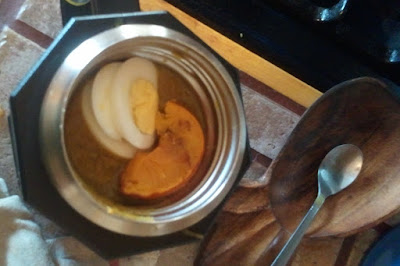
An actual "lunch" box (thermos, rather) - Leftover Mock Split Pea Soup with a sliced hard boiled egg, some pumpkin chunks, and (not visible) chunks of sausage. Also not pictured - a jar of coffee with coconut milk.
I work a 12+ hour night shift one night a week, at least half of which is moderately active, so I have to have a midnight meal. I generally stick leftovers in a thermos, as in the above photo.
On my day shifts, I usually take a salad with lots of stuff on it, and often some nuts, fruit, or the like. Sometimes leftovers that can be kept in the thermos or don't require reheating. Maybe I'll photograph that, too.
Unfortunately, as homeschoolers, we are inherently Lunchbox Challenged, and not in a way that is conducive to this particular contest. We don't even own lunchboxes.
This is a normal lunch for us:
Scrambled egg with bacon, leftover Shrimp, Sausage, and Summer Squash casserole, and water.
Gratuitous baby picture
Not exactly practical eating after sitting around in a lunchbox for half a day, right?
So, we decided to make a more travel-appropriate lunch.
When I told the kids we were going to make lunchboxes, LemurBoy took it literally, and went out to saw a piece of wood to make a box. This particular plan was perhaps a bit overambitious, but, after some drama at the idea of not creating a permanent lunchbox, they happily settled down with cardboard boxes.
I'm pretty sure LB re-invented the Bento all on his own
With the kids' input, we decided to try to make sandwiches, baked pumpkin, roasted pumpkin seeds, and carrot sticks.
We've been reading The Little House Cookbook. Given the prominence of grains in the diet of the time, this may seem an odd choice for us, but it's full of traditional food recipes, including lots of garden produce, wild game, food preservation, and all that other good stuff. Some of the grainy recipes can be adapted to grain-free alternatives, but there's plenty that require little or no adaptation. It's all set in a kid-appealing context (the Little House series) with plenty of good historical food and lifestyle info.
The cookbook
Since we have little pumpkins coming ripe in the garden, we decided to use those for a Little House-style recipe. We actually used (roughly, anyways) the Hubbard Squash recipe, as it was more appropriate to what we wanted to do than the actual pumpkin recipes, and read about how both pumpkins and other squashes were grown and used.
Little pumpkins (Jack-Be-Little variety, I believe) on the vine
The green beans were also from our garden.
Preheat oven to 350F. Cut tops off pumpkins (or other winter squash) as you would for jack-o-lantern, or just slice them in half. Unless you specifically want to preserve the cute pumpkin shape, cutting them down the middle is going to be much easier. De-seed. I saved the seeds for roasting. Rub inside of pumpkin with an heat-appropriate fat (recipe suggests butter. I used bacon grease), and spice as desired. For these, I used a mixture of cinnamon, ginger, nutmeg, and a touch of salt, so they'd be like pumpkin pies. You could probably drizzle a little maple syrup or other sweetener to make them more dessert like. A more savory spice mix works well, too. Put the pumpkins skin-side down in a baking tray, and fill the tray about 1/2 inch full of water. Bake until soft enough to poke with a fork - 1.5-2 hours.
For roasted pumpkin seeds, clean pulpy bits from seeds (this is time consuming and irritating). Lightly coat with oil, spice and salt as desired (I used a random mix including garlic powder, paprika, onion powder, and other stuff that I'm not sure of), and spread in a single layer on a baking tray. Bake at 350 until golden brown, or about 20-30 minutes.
Next time I make them, I'll plan ahead more and soak them in salt water for 24 hours first. This reduces the phytic acid, an anti-nutrient. Also, it makes them salty.
I've been experimenting with coconut flour lately. Coconut flour is made from defatted coconut (if the fat is there, it turns into coconut butter intead of flour), and is rather expensive. Making coconut milk from shredded coconut results in lots of coconut pulp... or defatted coconut. So now I'm drying the pulp and blendering it up into flour, and I've been trying various recipes to see if it seems to perform the same as store-bought coconut flour (which I've never bought). I've made cookies and pancakes with good success, so we decided to try some sandwich bread.
This (or minor variations thereof) is the most common pure coconut flour recipe. I cut it in half, replaced most of the oil with pear puree (both primarily for cost reasons), and didn't include added sweetener.
Waiting for the bread to bake.
It came out very flat. I'm not certain our baking powder, which well over a year old and not particularly well-stored, is still active. So I ended up chopping the loaf into three sections, then in half length-wise, sub style, rather than doing more traditional sandwich slices.
While everything cooked (I did everything in the oven at once, just for varying lengths of time), LB cut up carrot sticks, and made himself some deviled eggs, too.
LB cutting carrot sticks
I fried up some thinly sliced steak that had been marinating in the fridge, and used that in LB and my sandwiches. LG declared she didn't want meat - she wanted a carrot sandwich. So that's what she had.
I also hard boiled some eggs, since we were out.
The results:
LG's finished lunch - Carrot sandwich on coconut bread (mostly eaten), green beans, hard boiled egg, baked pumpkin, roasted pumpkin seeds.
LB's lunch - Coconut bread sandwich with steak strips, deviled eggs, baked pumpkin, carrot sticks and green beans, roasted pumpkin seeds.
Nomming
Once again, a gratuitous baby eating vegetables shot
The bread ended up tasting very eggy (which was also my experience when making muffins). I have a feeling I have to use a larger quantity of the homemade flour than I would of store-bought. The cookies I made the other day turned out very cookie-like, and not particularly eggy, but in that case I kept adding flour until the dough held together.
The kids liked it, regardless.
The pumpkin was not a huge hit with the older kids. Honestly, one of them turned out amazing - sweet and full of pumpkiny flavor, but the other three were kind of bland. Not horrible, and they probably would have been very good with some butter and maple syrup, but not nearly so tasty as the other one.
Unfortunately, many squashes don't seem to play well with me and the baby's digestive systems. Most unfortunate, since we're the ones who like them!
Everyone loved the pumpkin seeds. We had some seeds from other squash mixed in there too, and those turned out just as good. We'll be saving up our squash seeds from now on to make bigger batches.
Practicality:
This is not a lunch you can throw together the morning of. It took hours to get everything together - some time could be cut from that with more experience (not fumbling with the bread recipe, cutting the pumpkins in a simpler way), but much was unavoidable baking time. However, most of it could be made in quantity in advance and most of the individual recipes weren't all that time consuming (requiring more baking time than actual prep time). The pumpkin, while good warm, would be best for a lunchbox if cooked ahead of time and chilled. These would be very simple to prep and throw in the oven while something else was cooking. The pumpkin seeds keep for a while if stored properly, so it would be easy to make a big batch once and dole them out appropriately. I don't know how well the bread keeps, and therefore I don't know whether it would be practical to make a big batch at once.
As a bonus, here's an actual "lunch" that got taken to work:
An actual "lunch" box (thermos, rather) - Leftover Mock Split Pea Soup with a sliced hard boiled egg, some pumpkin chunks, and (not visible) chunks of sausage. Also not pictured - a jar of coffee with coconut milk.
I work a 12+ hour night shift one night a week, at least half of which is moderately active, so I have to have a midnight meal. I generally stick leftovers in a thermos, as in the above photo.
On my day shifts, I usually take a salad with lots of stuff on it, and often some nuts, fruit, or the like. Sometimes leftovers that can be kept in the thermos or don't require reheating. Maybe I'll photograph that, too.
Monday, September 5, 2011
Mad Science
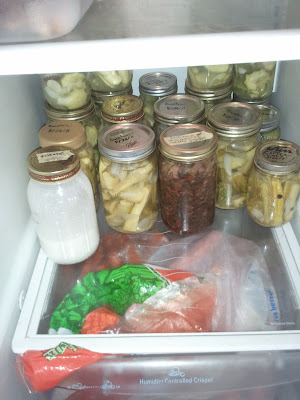
I think I just crossed over into firm Mad Kitchen Scientist territory. Today I jarred up our latest batch of lacto-fermented zucchini pickles. Putting it in the fridge, I noticed a jar of white stuff shoved in the back.
Great. Someone had opened up a can of coconut milk without using what I already had in there, and the old one had probably gone bad by now. Since making coconut milk isn't exactly an effortless activity, this irritated me a bit.
I opened it and sniffed it. It smelled a little sour, but not in a bad way. It had thickened up a little.
So what did I do? Tasted it.
I had accidentally made coconut milk yogurt. It wasn't fabulous, but not inedible, either. I've had coconut milk that's gone rancid, and that's gross. This wasn't like that at all.
The lid I had been using on the jar of coconut milk was labeled sauerkraut, and given our recent zuccini-pickle kick, the jar was likely previously used for fermented food as well. Whichever the source, it was apparently inoculated with lactobacillus.
So I dumped another cup of coconut milk in, and stuck it back in the fridge to see what would happen. I guess we'll see what happens in a few days, if the bites I took of it earlier don't kill me.
Friday, August 5, 2011
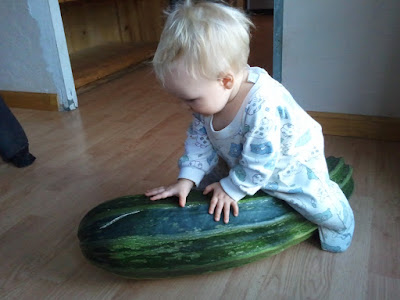
Zucchinipocolypse FTW
Our produce cleaned up at the county fair.

The beans, zucchini, and pattypan squash are from our garden.

Tuesday, August 2, 2011
Zucchini Pineapple Coconut Muffins
Based on the Elena's Pantry recipe for Zucchini Chocolate Chip Muffins, these are entirely fruit-sweetened.
Preheat oven to 350F.
Combine pineapple and zucchini. Squeeze out excess liquid.
Combine coconut flour, salt, and baking soda in one bowl. Combine wet ingredients, zucchini, and pineapple in another bowl, then mix in dry ingredients.
Spoon batter into muffin tin (I suggest liners - greasing them didn't work well for me). Sprinkle each muffin with a little shredded coconut.
Bake 18-22 minutes for mini muffins, or 25-30 minutes for larger muffins. Or longer - start there and see how they are.
This recipe makes 6 mediumish muffins, or 12 mini-muffins.
I highly suggest being sure to squeeze out the excess liquid and using liners...
When I make them again, I think I'll reduce the coconut oil to 2 tbsp and cook them a little longer. They were a bit on the greasy side, and the bottoms weren't particularly done.
For the coconut flour, I used the leftover pulp from making coconut milk (as that's basically what coconut flour is - coconut that has been defatted and finely ground. Convenient, right?). Just straight from the blender, with as much of the milk squeezed out as possible - I didn't dry it out first, as the homemade coconut flour recipes recommend - seems like a waste of energy, and easier just to cut back on the wet ingredients a bit if necessary. As such, I have no idea if it behaved anything like commercial coconut flour, as I've never baked with it. But they were acceptable for our purposes.
Comments on the original recipe have suggestions for making them eggless with ground flaxseed and/or applesauce.
- 8 oz can of pineapple in its own juice (tidbits or crushed - if you get rings or bigger chunks, you'll want to chop them up. I suppose you could use fresh pineapple plus a few tablespoons of sweetener if you prefer)
- Enough shredded zucchini to make 1 1/2 cups when combined with drained pineapple (a bit more than 1 cup)
- 1/3 cup coconut flour
- 2 eggs
- Scant 1/4 teaspoon salt (I used 1/4 teaspoon, and they ended up a touch on the salty side)
- 1/4 teaspoon baking soda
- 1/4 cup coconut oil
- 1/3 cup shredded coconut + extra to sprinkle on top.
Preheat oven to 350F.
Combine pineapple and zucchini. Squeeze out excess liquid.
Combine coconut flour, salt, and baking soda in one bowl. Combine wet ingredients, zucchini, and pineapple in another bowl, then mix in dry ingredients.
Spoon batter into muffin tin (I suggest liners - greasing them didn't work well for me). Sprinkle each muffin with a little shredded coconut.
Bake 18-22 minutes for mini muffins, or 25-30 minutes for larger muffins. Or longer - start there and see how they are.
This recipe makes 6 mediumish muffins, or 12 mini-muffins.
I highly suggest being sure to squeeze out the excess liquid and using liners...
When I make them again, I think I'll reduce the coconut oil to 2 tbsp and cook them a little longer. They were a bit on the greasy side, and the bottoms weren't particularly done.
For the coconut flour, I used the leftover pulp from making coconut milk (as that's basically what coconut flour is - coconut that has been defatted and finely ground. Convenient, right?). Just straight from the blender, with as much of the milk squeezed out as possible - I didn't dry it out first, as the homemade coconut flour recipes recommend - seems like a waste of energy, and easier just to cut back on the wet ingredients a bit if necessary. As such, I have no idea if it behaved anything like commercial coconut flour, as I've never baked with it. But they were acceptable for our purposes.
Comments on the original recipe have suggestions for making them eggless with ground flaxseed and/or applesauce.
Friday, July 29, 2011
Mock Split Pea Soup
Yep, it's another Zucchinipocolypse special!
Fry bacon in the bottom of a lightly greased soup pot until about halfway cooked (you can chop up your veggies while it is cooking). Separate out 1/2 to 2/3 of the bacon and set aside. Add onion (and more grease if necessary), and fry until softened. Add zucchini, and enough broth to cover the zucchini. Add spices, and simmer for a half hour or so.
While it is simmering, in a separate pot, take the remainder of the broth, and cook the carrots, celery, and anything other veggie you're adding. (Alternatively, use roasted veggies that are already soft)
After about 1/2 hour, remove zucchini from heat. Use an immersion blender to blend it up or pour into a normal blender (be very careful with this - make sure your blender is designed to withstand heat, it is covered properly, don't overfill, and so forth). Pour pureed soup back into saucepan. Mix in reserved bacon, cooked veggies, and add remaining broth gradually until you get the consistency you want. It's ready at this point, but you can cook a bit longer to let the flavors meld more.
The resulting soup looks and tastes a lot like split pea soup, but the consistency is smoother. I'm sure you could adapt this to use with to use with ham instead of bacon, or even make it vegetarian with a good vegetable broth base, though the smoky flavor of the bacon is what makes it like split pea soup (smoked almonds have been suggested as a vegetarian alternative). I made it with fish broth and added canned fish after pureeing, and it was like a thin chowder.
According to LemurDa, this soup (minus the carrots or other additional veggies and with homemade broth) has about 11 grams of carbs per 10 oz. serving.1
- Mock Split Pea Soup
- 5 medium zucchinis (we used a mixture of zucchini and pattypan squash - I don't think it changed the flavor that much), shredded or chopped into small pieces
- 2 cups (or more!) chopped bacon, uncooked
- 1 diced onion
- 6 cups broth
- A dollop of some sort of fat for frying
- A few chopped up carrots, celery, or whatever else you like in split pea soup
- Spices to taste. I used about 2 tsp garlic powder, 2 tsp onion powder, 1 tsp paprika, and a tablespoon of oregano. Some pepper would be good. The broth was pretty salty already, so I didn't add any.
Fry bacon in the bottom of a lightly greased soup pot until about halfway cooked (you can chop up your veggies while it is cooking). Separate out 1/2 to 2/3 of the bacon and set aside. Add onion (and more grease if necessary), and fry until softened. Add zucchini, and enough broth to cover the zucchini. Add spices, and simmer for a half hour or so.
While it is simmering, in a separate pot, take the remainder of the broth, and cook the carrots, celery, and anything other veggie you're adding. (Alternatively, use roasted veggies that are already soft)
After about 1/2 hour, remove zucchini from heat. Use an immersion blender to blend it up or pour into a normal blender (be very careful with this - make sure your blender is designed to withstand heat, it is covered properly, don't overfill, and so forth). Pour pureed soup back into saucepan. Mix in reserved bacon, cooked veggies, and add remaining broth gradually until you get the consistency you want. It's ready at this point, but you can cook a bit longer to let the flavors meld more.
The resulting soup looks and tastes a lot like split pea soup, but the consistency is smoother. I'm sure you could adapt this to use with to use with ham instead of bacon, or even make it vegetarian with a good vegetable broth base, though the smoky flavor of the bacon is what makes it like split pea soup (smoked almonds have been suggested as a vegetarian alternative). I made it with fish broth and added canned fish after pureeing, and it was like a thin chowder.
According to LemurDa, this soup (minus the carrots or other additional veggies and with homemade broth) has about 11 grams of carbs per 10 oz. serving.1
Wednesday, July 27, 2011
While we're on this zucchini kick...
- Zucchini Frappuccino
- 1 tray coffee ice cubes (this is what we do if we have leftover coffee)
- 1 smallish zucchini
- enough liquid (coffee, milk of some sort, water) so that the blender will work (I needed like 1/4 cup)
- Optional: Sweetener, ripe banana, flavored syrup, cocoa powder, etc. to taste
Put stuff in blender. Blend. Makes about one "venti" or two "tall" servings.
Other recipes for frappuccino-knockoffs I've seen call for plain ice cubes/crushed ice + strong coffee. That would presumably work, too. Coffee ice cubes were what I happened to have on hand. If you go that route, I'd think you'd want to blend all ingredients except ice well first, then you can blend the ice just until it gets to the right texture. (Updated: I tried this method because we didn't have any more coffee ice cubes, and it didn't work well for me. The coffee was still slightly warm when I tried, and the blender too efficient at blending ice, so it just ended up watery, not icy, and not very good. I drank it anyways because I had to go to work. Update 2: Coffee ice cube method definitely works better. And paddypan squash is just as satisfactory as zucchini.)
It doesn't taste like zucchini, with a caveat - our garden zucchinis may be more mild flavored than zucchinis found at the store. If your attempts at making zucchini-stuff come out too strongly zucchini flavored, peeling may help - the peel, especially of older/larger zucchinis, has a bitter flavor. Add zucchini gradually to get a balance between creaminess and zucchininess, and be sure you use sweetener or some other flavoring. Or track down someone with a garden. This time of year they'll probably be happy to unload some zucchini.
If you try any of my crazy recipes, please let me know how it turns out, even if you think it's blech! I always pass them by at least one other set of tastebuds (in this case, a former Starbucks employee), but none of us around here could really be said to have typical American tastes, so it's possible that they're actually all intolerable to anyone who isn't nutso like us. If so, I'd like to know! After all, it's been years since I've had an actual frappuccino.
Tuesday, July 26, 2011
Unusual abundance
We are starting to experience Zucchinipocolypse.
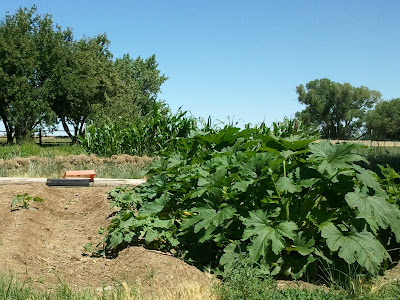
I'm not crazy about zucchini, particularly cooked, but we're working it out. Raw or lightly cooked, it has such a mild flavor that it's relatively unobtrusive. We've been making zucchini hummus and zucchini pancakes (I shredded carrot, powdered garlic and onion, and chopped bacon. The bacon really makes the dish!). I made zucchini "noodles" by shaving thin strips, which I mixed into a curry. Tonight I'm making this soup (roughly, anyways). (Edit: The soup turned out awesome. It's a cream soup with no cream! LemurGirl even asked for seconds.)
For surprising uses... it works well as an ice cream base.
Cut cantaloupe and zucchini into chunks. Put in blender with coconut, and blend until smooth, adding just enough coconut milk to allow it to blend. Put mixture in ice cream maker, or freeze into ice cubes then blend in a high-power blender or food processor. The blender method didn't work particularly well for us. We usually use the ice cream maker, but LemurBoy desperately wanted to try the blender method, so I decided to give it a shot, but the blades just didn't get an adequate grip on the cubes. I ended up dumping it in the food processor to finish, as I feared burning out the motor on the blender.
Both kids ate it happily. Neither realized the secret ingredient without being told. LemurGirl declared this the best ice cream ever. I didn't add any sweetener, but our tastebuds are pretty adapted to lower sugar. If yours aren't, and your melon isn't super-ripe, you may want to add a little something.
If a green tinge is an aesthetic or pickiness problem, just shave off the peel.
I actually found myself saying, "Gee, I wish we had more zucchini" today. The two medium ones were used for zucchini pancakes for lunch, the large one is earmarked for the soup, and I wanted to try a new ice cream idea, too.
So I went out and looked, and another good-sized one had magically appeared in the two hours since I picked the zucchinis for lunch.
Chop zucchini into chunks to facilitate blending. Blend all ingredients except chocolate chips in the blender. Pour into ice cream maker and use as directed. Stir in chocolate chips if using.
We used homemade mint jelly/syrup made from the mint running rampant in our orchard.
The texture of these ice creams is kind of more like ice milk - using a higher proportion of coconut milk (or real cream) would probably make it creamier. But regardless, still tasty, cold, and kid and adult-approved.
More garden pictures:

Baby in the squash patch
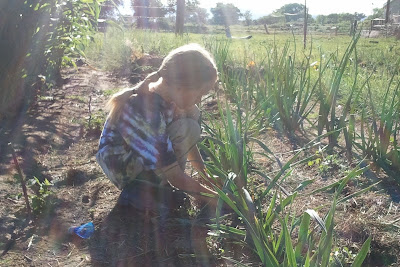
LemurBoy picking leeks for the soup
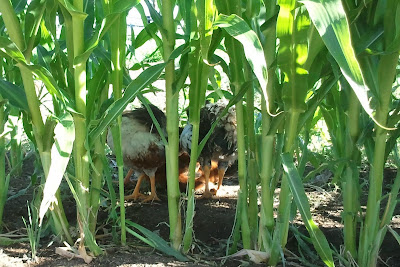
Chickens in the corn
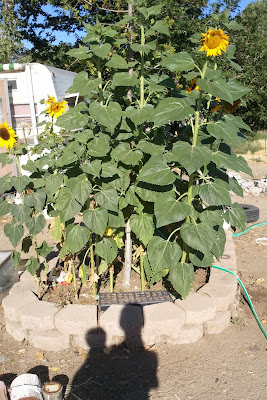
Sunflowers
A friend is getting goats, and asked about what we feed ours. I wrote that we feed them lots of a certain type of weed that grows in our yard, then realized that I should probably check to make sure it's actually safe before I recommended it. I looked in a local weed identification guide, and discovered the weed is called Kochia, and that it's actually wonderful - it has a higher nutritional value than alfalfa hay, and is actually cultivated for animal feed in some areas.
We have literally an acre of this stuff growing. We weed it daily to feed to the goats, but it's impossible to keep up.

Our kochia crop, with large dogs for perspective. The whole yard looks similar. As does the side yard. And the area by the driveway.
Thank goodness we haven't got around to mowing it down! If we can get it cut, dried, and stored appropriately, it should save us some money in animal feed over the winter.
I'm not crazy about zucchini, particularly cooked, but we're working it out. Raw or lightly cooked, it has such a mild flavor that it's relatively unobtrusive. We've been making zucchini hummus and zucchini pancakes (I shredded carrot, powdered garlic and onion, and chopped bacon. The bacon really makes the dish!). I made zucchini "noodles" by shaving thin strips, which I mixed into a curry. Tonight I'm making this soup (roughly, anyways). (Edit: The soup turned out awesome. It's a cream soup with no cream! LemurGirl even asked for seconds.)
For surprising uses... it works well as an ice cream base.
- Zucchini-Cantaloupe Ice Cream
- 1/2 cantaloupe (ours was one the small side, and the flavor was noticeable, but not particularly strong. Half a normal-sized cantaloupe would probably work well.)
- 1 normal-sized zucchini
- 1 cup shredded coconut (not strictly necessary - I used the leftover pulp from making coconut milk)
- Coconut milk (just enough so that everything else will blend)
Cut cantaloupe and zucchini into chunks. Put in blender with coconut, and blend until smooth, adding just enough coconut milk to allow it to blend. Put mixture in ice cream maker, or freeze into ice cubes then blend in a high-power blender or food processor. The blender method didn't work particularly well for us. We usually use the ice cream maker, but LemurBoy desperately wanted to try the blender method, so I decided to give it a shot, but the blades just didn't get an adequate grip on the cubes. I ended up dumping it in the food processor to finish, as I feared burning out the motor on the blender.
Both kids ate it happily. Neither realized the secret ingredient without being told. LemurGirl declared this the best ice cream ever. I didn't add any sweetener, but our tastebuds are pretty adapted to lower sugar. If yours aren't, and your melon isn't super-ripe, you may want to add a little something.
If a green tinge is an aesthetic or pickiness problem, just shave off the peel.
I actually found myself saying, "Gee, I wish we had more zucchini" today. The two medium ones were used for zucchini pancakes for lunch, the large one is earmarked for the soup, and I wanted to try a new ice cream idea, too.
So I went out and looked, and another good-sized one had magically appeared in the two hours since I picked the zucchinis for lunch.
- Mint Chocolate Chip Zucchini Ice Cream
- 2 zucchinis (on the smallish side of medium will give you the most neutral taste)
- mint jelly (or mint extract + sweetener, or maybe even raw mint + sweetener) to taste
- enough coconut milk to allow it to blend
- A tablespoonful of coconut oil (probably not strict necessary. I just felt like throwing it in)
- 1 tsp vanilla
- Chocolate chips, or 1-2 tablespoons cocoa powder if you don't have them (as we didn't), but that ruins the all-natural bright green color of the ice cream!
Chop zucchini into chunks to facilitate blending. Blend all ingredients except chocolate chips in the blender. Pour into ice cream maker and use as directed. Stir in chocolate chips if using.
We used homemade mint jelly/syrup made from the mint running rampant in our orchard.
The texture of these ice creams is kind of more like ice milk - using a higher proportion of coconut milk (or real cream) would probably make it creamier. But regardless, still tasty, cold, and kid and adult-approved.
More garden pictures:
Baby in the squash patch
LemurBoy picking leeks for the soup
Chickens in the corn
Sunflowers
A friend is getting goats, and asked about what we feed ours. I wrote that we feed them lots of a certain type of weed that grows in our yard, then realized that I should probably check to make sure it's actually safe before I recommended it. I looked in a local weed identification guide, and discovered the weed is called Kochia, and that it's actually wonderful - it has a higher nutritional value than alfalfa hay, and is actually cultivated for animal feed in some areas.
We have literally an acre of this stuff growing. We weed it daily to feed to the goats, but it's impossible to keep up.
Our kochia crop, with large dogs for perspective. The whole yard looks similar. As does the side yard. And the area by the driveway.
Thank goodness we haven't got around to mowing it down! If we can get it cut, dried, and stored appropriately, it should save us some money in animal feed over the winter.
Monday, July 4, 2011
Coconut Donut Holes
In my Coconut Chicken Nuggets post, I mentioned that I'd need to try donut holes very soon.
I wasn't joking about the "very" part. The idea was too good to resist trying immediately.
I actually did measure out this recipe while making it, so all measurements are accurate.
* 1 egg (I'm wondering if this would work with pureed apple or banana for those avoiding eggs)
* Approximately 1/3 cup shredded coconut
* Spices (I used 1/4 teaspoon cinnamon, some freshly grated nutmeg, and a pinch of ground cardamom. A little bit of vanilla would probably be good (I meant to add that, but forgot). Maybe even some cocoa powder.)
* Sweetener (optional)
* Fat of choice for frying
Break egg into bowl and mix. Add coconut 1 tablespoon at a time until you get a dough that holds together and keeps its shape - It took 5 tablespoons for me. Keep in mind that it's easier to add more coconut than more egg, so go slow with the coconut. Mix spices into dough. Roll into little balls a bit smaller than you want to donut holes to be (they'll puff up a bit while cooking).
Heat fat. When hot enough, drop balls of dough into it. Cook for 2 or 3 minutes, rolling them around as necessary to cook thoroughly. Remove from pan and let cool a bit before eating. I think they're best still warm, but I stuck one in the fridge for a while to see how it would hold up, and it was still tasty.
This made 8 donut holes for me.
About sweetener: Since coconut is naturally on the sweet side, these don't desperately need any added sweetener. Both kids liked them unsweetened. Leaving them unsweetened probably also helps with portion control.
But if your goal is authenticity, or if you're making these for people with conventional taste buds, you'll want to add a little bit of sweetener.
If the idea of deep (or, in this case, more than a light coating but not particularly deep) fat frying intimidates you, don't stress it. This was really the first time I've done it. I just dumped about 1/2 inch of bacon grease in a little saucepan, heated it, and fried them up.
Thus ends Impromptu Fried Food Day. I'm way too stuffed for anything else!
Coconut chicken nuggets
Our housemate ground up some chicken parts today, and offered to make some chicken patties for the kids' lunch. I decided no... now that we have coconut, I was going to try some chicken nuggets.
Unfortunately, I didn't really measure as I went along, so all measurements are estimates.
This was very gloppy chicken grind, so I mixed about half a cup of coconut in with it in an attempt to absorb some of the liquid and get it to hold together a bit better. It kinda worked. I don't think you'd need to do this with commercial ground meat. Alternatively, you could cut non-ground chicken up into chunks (or strips) and use that.
Ingredients:
* 3 cups ground chicken. No, I don't know how much that is by weight. That's just the size of the container it was in.
* 2 eggs (some milk, dairy or otherwise, might work if you can't do eggs)
* 1 cup shredded coconut (I used the Let's Do Organic brand, which is very finely shredded. If you're using something not finely shredded, you might want to whizz it a bit in the food processor first)
* Seasonings to taste (I used about 1/2 tsp each of salt, garlic powder, and onion powder)
* Fat of choice if frying
(Again, all of that is an estimate. You could start with half the amount of coconut and spices and make more as needed if you're trying to avoid waste.)
Stir together coconut, salt, and spices in a bowl. Crack eggs into a separate bowl and beat them together.
Shape (or cut, if not ground) chicken into appropriately sized nuggets. Coat in egg. Roll in coconut mixture. I set them on a cookie tray until I had enough to fill the frying pan.
Heat fat of choice in frying pan. When it is hot, put nuggets in frying pan. It smells wonderful while cooking! Mine took about 10 minutes to cook thoroughly, with flipping every few minutes. Smaller ones would undoubtedly cook faster. When the coconut was nicely browned, they were adequately done.
Alternatively, you should be able to bake them at 400F for 15-20 minutes (until brown) if you'd like to avoid the frying.
This made about 20 nuggets that were about twice the size of normal fast food nuggets. Everyone who tried them loved them, and the kids came back for seconds. I think we'll have to do this again!
I took the leftover coconut and leftover egg, mixed them together into a little dumpling, and fried that as well. It was a little on the salty side, but had serious potential. Sugar/grain-free "Donut Hole" experimentation will be occurring in the very near future. (Edit: The future is now: http://learninglemurs.blogspot.com/2011/07/coconut-donut-holes.html)
Sunday, July 3, 2011
Ongoing coconut milk experimentation
We got out shredded coconut yesterday.
The box was much smaller than I expected. Not unreasonably small - the 8oz bags are about half of typical 16oz size, and they're compressible, so 12 can fit in a pretty small space. But I think there's an expectation, given the cost, that it's going to be a huge box. The shreds themselves were smaller, too - it is very finely shredded, not like the normal store shredded coconut. This is just fine for our purposes, really.
This time, I mixed 1 cup of coconut with 2 cups very hot water, left it to sit for several hours, and then blended it. It came out VERY thick, and not particularly smooth, but not as grainy as the previous batch, either. A lot of the liquid was absorbed, and pressing it through the strainer, I only got about a half cup of milk. That won't do!
I blended it some more, and added another cup or so of water. That produced about 2 cups of liquid of quite acceptable quality. I tried it in my coffee this morning, and it was fine.
I ate some of the leftover coconut pulp along with some pineapple for dessert. I'll have to figure out something fun to do with the rest of it. I want to experiment with coconut flour baking, and this may be a way to do it without using up our supply (because it won't get bought again if it isn't a savings over the canned milk!). Another option is to try making a second-press for just drinking straight.
There was a solid layer on top this morning (presumably the oil). Not a bad thing, since that means the oils are there and the emulsifiers aren't, but it makes it a touch hard to use. I can either make it in smaller quantities and store it in one of our lidded Magic Bullet knock-off cups for easy re-blending in the morning, or just get it out first thing and leave it on the counter until it comes up to temperature.
Last time I made coconut milk from shredded coconut, the resulting milk was very sweet and directly drinkable. This was more like standard coconut milk - not bad, but not quite so horchata-like. I kind of suspect the other coconut we used (a foreign brand) may have had added sweetener that wasn't listed on the label.
Next time (after we use the milk I already made, plus the 2 cans I already (accidentally) opened before the coconut arrived, so it could be a few days), I'm going to try adding just enough water to thoroughly wet the coconut, leave it soaking overnight, blend that, and then add more water to get to the desired consistency. I think this will allow more contact with the blender blades, and get it even smoother.
I'm sure this all sounds like a lot of work for coconut milk compared to just opening the can, but it really comes out to about 5 minutes of actual doing-stuff, so it's worth it, especially if done in large enough quantity - I'm likely to start doing a quart at a time once I get the process down.
And if this all works out, I think that next time we're going to go for the 22lb bag, which brings the cost down to $0.14/oz of shredded coconut, as opposed to about $0.22/oz now.
Thursday, June 23, 2011
Everything Is Escaping
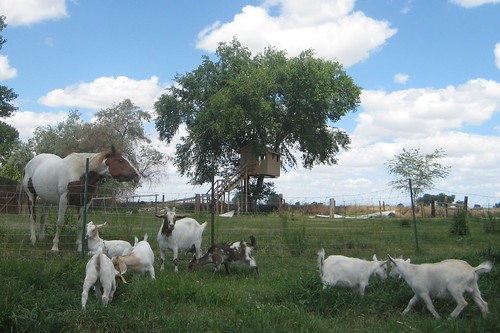
A week ago... 2? Something like that... we started letting the goats out in the pasture. The back fence really isn't up to goat-holding, but they really must start earning their keep, or at least requiring less in the way of "keep". For a while it was fine - they stuck mainly to the front third of the pasture, but the past few days they've been heading off for parts unknown on a regular basis, while we try to get that back fence reinforced. We set LemurBoy out in the orchard (not actually in the pasture, but adjacent, and cool and shady) to play goat-herd when they headed out. That works for a while, but he hasn't been socialized into a child labor society where sitting out watching goats all day would be totally normal at 8. Ah well.
We've started feeding them weeds instead of hay when they're in the corral. Weeds are plentiful, free, and their preferred food anyways. It's more work, but necessary regardless. The sandy soil around here makes them easy to pull, and they grow about half a foot a day, so I can clear a big section of the property and fill a big bucket with enough food for all of them in about 20 minutes if I hit the right area. It's very satisfying, though I admit I'm loathe to do it on particularly hot days.
The mama goat (aka Turbo. The teenage boys of the previous owner named their goats, so that their mom wouldn't get attached) is the matriarch of the herd. She's rather bossy, and tends to chase everyone but her nurslings away from the food (we have multiple feedings spots, so they still get to eat!). Even in the pasture, where food is all around. It's rather silly. I can sympathize - making milk for three kids has to take a lot out of her.
The three nurslings' (are they still nursing? I'm not certain. But it's useful for classification) personalities are still rather undistinct, but they're very pretty and docile, willing to be hugged and petted. I'm not sure what their names are. I've heard Fleur, Chinchilla, Jedi, and Curry... but there's only three of them. Curry's the only one I'm sure about. I imagine you can guess his intended fate.
 B.B. (Bottle Baby) is Turbo's 4th kid whom she rejected. He's about half the size of his siblings (whether that's due to being bottlefed or some congenital problem that caused his mother to reject him in the first place we're not sure), and thinks he's a human. He seemingly has no survival instinct, and wanders off from the herd, especially if there's a person somewhere around. He's probably going to end up being a pet.
He strikes me as the skinny little hyperactive genius kid who was always hanging around talking the heads off the adults instead of playing on the playground.
Dumb and Dumber, or Beavis and Butthead, are the two pygmy males. I think that's all I really need to say about them.
 Marsha is the pygmy female. She strikes me as the most intelligent of the lot. She's cute and sweet and inquisitive, but rather skittish. I get the impression she's starting to tame down a bit - I've been able to pet her on a few occasions without her running away.
LemurDa thinks he wants to get rid of the pygmies and focus on the bigger goats. The original plan was to try to breed a boer/nubian/pygmy cross, and keep Marsha for milk, but given how docile the boer/nubian kids are, they're starting to feel more appropriate for that. I quickly talked him into selling Marsha instead of eating, which makes sense both because we'll get more than she'd likely be worth in meat, and because, if you can't tell, I'm kind of fond of her.
(If anyone localish is looking for a pygmy or three, let me know.)
Meanwhile, the chickens broke into the goat pen, and we decided to just let them. That's the eventual goal anyways. Many of them are big enough to stand up to the cats at this point, and the goats act threatening enough towards the cats that they've so far avoided the goat pen.
We had a smaller scale Chicken Run a few weeks ago, when we first put them outside. The cats did manage to get one that time, bringing us down to 35 chickens.
I don't think we've lost any besides the one that got catted and the three day old that died of unknown causes. Or at least I haven't found any scattered feathers or random chicken legs lying around. But I'm not up to trying to count 35 chickens running around like, well, chickens with their heads not cut off, so I can't say for sure.
Compare this to:
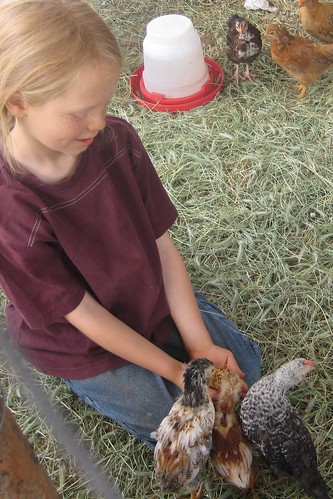
Sharp observers may remember we started with 21 chicks. The day we moved the first batch outside, the local farm supply store was selling 2 week old chicks off for $0.50 each because they were getting "too old" to sell - presumably too big for their brooder or something. A lower price AND two less weeks we have to feed and house (indoors, when they're so young, and it was still cold at that point) the things. Score!
Whichever ends up being the smallest rooster is set to be sold to a local friend with a flock of bantams whose rooster recently died. She may end up getting some hens, as well. A few with a particular color pattern just aren't growing as fast as the others, and we wonder if they'll end up being banties themselves. In that case, we may send them along with the rooster, as I'm not sure they'll ever be able to hold their own against the cats if that's the case.
Subscribe to:
Posts (Atom)